Lab-2-4
(2% of the course mark)
MySQL DB interaction with mysql2 / sequelize Lab
- In this lab, students will build a simple Node.js application that connects to a MySQL database using the mysql2 and sequelize packages. They will perform CRUD (Create, Read, Update, Delete) operations, manage connections efficiently, and handle errors properly. The lab focuses on practical database interaction within a backend application.
Lab objectives
-
Set up and configure a MySQL database for a Node.js application.
-
Use the mysql2 and sequelize package to establish a connection and execute queries.
-
Perform CRUD operations on a MySQL database from a Node.js app.
-
Handle query results and potential errors effectively.
-
Utilize prepared statements to prevent SQL injection.
-
Understand how Object-Relational Mapping (ORM) works.
Build Schema
- Open MySQL Workbench and run the following SQL commands:
-- Drop the database if it exists
DROP DATABASE IF EXISTS BACKEND_DB;
-- Create the database
CREATE DATABASE BACKEND_DB;
-- Use the database
USE BACKEND_DB;
-- Create the USERS table
CREATE TABLE USERS (
    ID INT AUTO_INCREMENT PRIMARY KEY,
    USER_NAME VARCHAR(50) UNIQUE NOT NULL,
    EMAIL VARCHAR(50) UNIQUE NOT NULL,
    CREATED_AT TIMESTAMP DEFAULT CURRENT_TIMESTAMP
);
-- Insert a row into the USERS table
INSERT INTO
USERS (USER_NAME, EMAIL)
VALUES
('bill.gates', 'bill.gates@microsoft.com'),
('elon.musk', 'elon.musk@tesla.com');
-- Verify
SELECT * FROM USERS;
Ensure that all the database objects are created successfully before proceeding to the next step.
Create basic MySQL Node.js app
-
Open VSCode and create a folder named MySql-Node-App.
-
Open the terminal and change the directory to MySql-Node-App.
-
Initialize the app by running the following command:
npm init -y
- Install typescript by running the following commands:
npm install typescript -D
npm install @types/node -D
- Initialize tsconfig.json by running the following command:
npx tsc --init
-
Modify tsconfig.json and uncomment outDir.
-
Modify tsconfig.json and add the following property:
"removeComments": true
- Install nodemon by running the following command:
npm install nodemon -D
- Install dotenv by running the following command:
npm install dotenv
- Create an .env file in the root of your project and enter the following.
SQL_HOST=localhost
SQL_USER=root
SQL_PASSWORD=password
SQL_DB_NAME=BACKEND_DB
- Install mysql2 by running the following command:
npm install mysql2
- Configure package.json by adding a new entry to the scripts property.
"build": "tsc",
"start": "nodemon ./dist/index",
- Configure package.json by adding a new property.
"type": "module"
- Create a file named index.ts and add the following code:
// Developer:
// Purpose:

import * as dotenv from "dotenv";
dotenv.config();
import { MySqlDB } from "./lib/MySqlDB.js";
const mySqlDB: MySqlDB = new MySqlDB();

async function main() {
  console.time("Benchmark");
  const connectResponse = await mySqlDB.connect();
  console.log(connectResponse);
  if (connectResponse.isConnected) {
    let queryResult: any = null;
    let options: any;

    queryResult = await mySqlDB.query("SELECT * FROM USERS");

    console.log("=========================");
    console.log("= Select all records... =");
    console.log("=========================");
    console.log(queryResult[0]);

    options = ["bill.gates"];
    queryResult = await mySqlDB.query(
      "SELECT * FROM USERS WHERE USER_NAME = ?",
      options
    );

    console.log("========================");
    console.log("= Select one record... =");
    console.log("========================");
    console.log(queryResult[0]);

    options = ["steve.jobs", "steve.jobs@apple.com"];
    queryResult = await mySqlDB.query(
      `INSERT INTO USERS (USER_NAME, EMAIL) VALUES(?, ?)`,
      options
    );

    console.log("========================");
    console.log("= Insert one record... =");
    console.log("========================");

    const insertId = queryResult[0].insertId;
    console.log(`insertId is ${insertId}.`);
    queryResult = await mySqlDB.query("SELECT * FROM USERS");
    console.log(queryResult[0]);

    options = ["steve.balmer", "steve.balmer@microsoft.com", "steve.jobs"];
    queryResult = await mySqlDB.query(
      `UPDATE USERS SET USER_NAME = ?, EMAIL = ? WHERE USER_NAME = ?`,
      options
    );

    console.log("====================");
    console.log("= Update record... =");
    console.log("====================");

    const changedRows = queryResult[0].changedRows;
    console.log(`changedRows: ${changedRows}.`);
    queryResult = await mySqlDB.query("SELECT * FROM USERS");
    console.log(queryResult[0]);

    options = ["steve.balmer"];
    queryResult = await mySqlDB.query(
      `DELETE FROM USERS WHERE USER_NAME = ?`,
      options
    );

    console.log("====================");
    console.log("= Delete record... =");
    console.log("====================");

    const affectedRows = queryResult[0].affectedRows;
    console.log(`affectedRows: ${affectedRows}.`);
    queryResult = await mySqlDB.query("SELECT * FROM USERS");
    console.log(queryResult[0]);

    const disConnectResponse = await mySqlDB.disConnect();
    console.log(disConnectResponse);
  }

  console.timeEnd("Benchmark");
}

main();
-
In the root folder of the app, create a folder named lib.
-
In the lib folder, create a file named DBConnectionFields.ts and add the following code:
// Developer:
// Purpose:

export class DBConnectionFields {
  host: string = "";
  user: string = "";
  password: string = "";
  database: string = "";

  constructor(host: string, user: string, password: string, database: string) {
    this.host = host;
    this.user = user;
    this.password = password;
    this.database = database;
  }
}
- In the lib folder, create a file named MySqlDB.ts and add the following code:
// Developer:
// Purpose:

import mysql, { Connection } from "mysql2/promise";
import { DBConnectionFields } from "./DBConnectionFields.js";

export class MySqlDB {
  dbConnectionFields: DBConnectionFields;
  connection: Connection | null = null;

  constructor() {
    this.dbConnectionFields = new DBConnectionFields(
      String(process.env.SQL_HOST),
      String(process.env.SQL_USER),
      String(process.env.SQL_PASSWORD),
      String(process.env.SQL_DB_NAME)
    );
  }

  async connect() {
    let connectResponse = {
      isConnected: false,
      message: "",
    };

    try {
      this.connection = await mysql.createConnection({
        host: this.dbConnectionFields.host,
        user: this.dbConnectionFields.user,
        password: this.dbConnectionFields.password,
        database: this.dbConnectionFields.database,
      });

      connectResponse.isConnected = true;
      connectResponse.message = `Connected to: ${this.dbConnectionFields.database}.`;
    } catch (error: any) {
      connectResponse.message = `Could not connect to: ${this.dbConnectionFields.database}.`;
    } finally {
      return connectResponse;
    }
  }

  async query(sqlStatement: string, options: [] = []) {
    let queryResult: any;

    if (this.connection != null) {
      queryResult = await this.connection.query(sqlStatement, options);
    }

    return queryResult;
  }

  async disConnect() {
    let disConnectResponse = {
      isDisconnected: false,
      message: "",
    };

    try {
      if (this.connection != null) {
        await this.connection.end();
      }

      disConnectResponse.isDisconnected = true;
      disConnectResponse.message = `Disconnected to: ${this.dbConnectionFields.database}.`;
    } catch (error) {
      disConnectResponse.message = `Could not disconnect to: ${this.dbConnectionFields.database}.`;
    } finally {
      return disConnectResponse;
    }
  }
}
- Build the app by running the following command:
npm run build
- Start the app by running the following command:
npm run start
- On the terminal output, take note of the value of Benchmark: xx.xxxms for this app, as it will be used later to compare with the result of the Sequelize Node.js app run.
Implement Lab-2-3 Library app (MySql-Node-App)
- Modify the .env file of the MySql-Node-App and update the value of SQL_DB_NAME to the name of the library app schema.
SQL_DB_NAME=NAME_OF_LIBRARY_APP_SCHEMA
-
Modify index.ts of the MySql-Node-App and write code that simulates patrons borrowing and returning books. Display the book totals every time a patron borrows or returns a book.
-
Build and run the modified app and take a screenshot of the terminal output and save it as library-mysql-node-app.png.
Create basic Sequelize Node.js app
Open MySQL Workbench and run the following SQL command:
DROP table USERS;
The Sequelize Node.js app below will recreate the USERS table on startup.
-
Open VSCode and create a folder named Sequelize-Node-App.
-
Open the terminal and change the directory to Sequelize-Node-App.
-
Initialize the app by running the following command:
npm init -y
- Install typescript by running the following commands:
npm install typescript -D
npm install @types/node -D
- Initialize tsconfig.json by running the following command:
npx tsc --init
-
Modify tsconfig.json and uncomment outDir.
-
Modify tsconfig.json and add the following property:
"removeComments": true
- Install nodemon by running the following command:
npm install nodemon -D
- Install dotenv by running the following command:
npm install dotenv
- Create an .env file in the root of your project and enter the following.
SQL_HOST=localhost
SQL_USER=root
SQL_PASSWORD=password
SQL_DB_NAME=BACKEND_DB
SQL_MAX=10
- Install sequelize by running the following commands:
npm install sequelize
npm install @types/sequelize -D
- Install mysql2 by running the following command:
npm install mysql2
- Configure package.json by adding a new entry to the scripts property.
"build": "tsc",
"start": "nodemon ./dist/index",
- Configure package.json by adding a new property.
"type": "module"
- Create a file named index.ts and add the following code:
// Developer:
// Purpose:

import * as dotenv from "dotenv";
dotenv.config();
import { DBConnectionFields } from "./lib/DBConnectionFields.js";
import sequelizeFactory from "./lib/Database.js";
import UserFactory, { User } from "./models/User.js";

const dBConnectionFields = new DBConnectionFields(
  String(process.env.SQL_HOST),
  String(process.env.SQL_USER),
  String(process.env.SQL_PASSWORD),
  String(process.env.SQL_DB_NAME),
  Number(process.env.SQL_MAX)
);

const sequelize = sequelizeFactory(dBConnectionFields);
UserFactory(sequelize);

async function main() {
  console.time("Benchmark");
  const dbInstance: string = `${process.env.SQL_HOST}:${process.env.SQL_DB_NAME}`;

  try {
    // This is optional, this is a test if the connection is working
    await sequelize.authenticate();
    console.log(`Connected to: ${dbInstance}.`);

    // Create the tables
    await sequelize.sync({ force: true });

    // Load the data
    await User.create({
      USER_NAME: "bill.gates",
      EMAIL: "bill.gates@microsoft.com",
    });
    await User.create({ USER_NAME: "elon.musk", EMAIL: "elon.musk@tesla.com" });
    console.log(`Data loaded.`);

    console.log("=========================");
    console.log("= Select all records... =");
    console.log("=========================");

    let users = await User.findAll();

    users.forEach((user) => {
      console.log(user.toJSON());
    });

    console.log("========================");
    console.log("= Select one record... =");
    console.log("========================");

    let user = await User.findOne({ where: { USER_NAME: "bill.gates" } });

    if (user) {
      console.log(user.toJSON());
    }

    console.log("========================");
    console.log("= Insert one record... =");
    console.log("========================");

    const newUser = await User.create({
      USER_NAME: `steve.jobs`,
      EMAIL: `steve.jobs@apple.com`,
    });

    console.log(newUser.toJSON());

    console.log("====================");
    console.log("= Update record... =");
    console.log("====================");

    const updatedUser = await User.update(
      { USER_NAME: `steve.balmer`, EMAIL: `steve.balmer@microsoft.com` },
      { where: { USER_NAME: `steve.jobs` } }
    );

    console.log(`Updated document: ${updatedUser[0]}.`);
    users = await User.findAll();
    users.forEach((user) => {
      console.log(user.toJSON());
    });

    console.log("====================");
    console.log("= Delete record... =");
    console.log("====================");

    const destroyedUser = await User.destroy({
      where: { USER_NAME: "steve.balmer" },
    });

    console.log(`Deleted document: ${destroyedUser}.`);
    users = await User.findAll();
    users.forEach((user) => {
      console.log(user.toJSON());
    });
  } catch (error) {
    console.log(`Could not connect to: ${dbInstance}.`);
  } finally {
    try {
      await sequelize.close();
      console.log(`Disconnected to: ${dbInstance}.`);
    } catch (error) {
      console.log(`Could not disconnect to: ${dbInstance}.`);
    }

    console.timeEnd("Benchmark");
  }
}

main();
-
In the root folder of the app, create the following folders lib and models.
-
In the lib folder, create a file named Database.ts and add the following code:
// Developer:
// Purpose:

import { Sequelize } from "sequelize";
import { DBConnectionFields } from "./DBConnectionFields.js";

const sequelizeFactory = (dbConnectionFields: DBConnectionFields) => {
  return new Sequelize(
    `mysql://${dbConnectionFields.user}:${dbConnectionFields.password}@${dbConnectionFields.host}:3306/${dbConnectionFields.database}`,
    {
      logging: true,
      pool: {
        max: dbConnectionFields.max,
        min: 0,
        acquire: 60000,
        idle: 10000,
      },
    }
  );
};

export default sequelizeFactory;
- In the lib folder, create a file named DBConnectionFields.ts and add the following code:
// Developer:
// Purpose:

export class DBConnectionFields {
  host: string = "";
  user: string = "";
  password: string = "";
  database: string = "";
  max: number = 0;

  constructor(
    host: string,
    user: string,
    password: string,
    database: string,
    max: number
  ) {
    this.host = host;
    this.user = user;
    this.password = password;
    this.database = database;
    this.max = max;
  }
}
- In the models folder, create a file named User.ts and add the following code:
// Developer:
// Purpose:

import { DataTypes, Model, type Optional, Sequelize } from "sequelize";

// Define the attributes for the User model which maps to the actual table
interface UserAttributes {
  ID: number;
  USER_NAME: string;
  EMAIL: string;
  CREATED_AT: Date;
}

// Define the creation attributes for the User model
// If the field is optional then define it here
interface UserCreationAttributes
  extends Optional<UserAttributes, "ID" | "CREATED_AT"> {}

// Define the User model class
class User
  extends Model<UserAttributes, UserCreationAttributes>
  implements UserAttributes
{
  public ID!: number; // ! means not null
  public USER_NAME!: string; // ! means not null
  public EMAIL!: string; // ! means not null
  public readonly CREATED_AT!: Date; // readonly means property as immutable
}

const UserFactory = (sequelize: Sequelize) => {
  // Initialize the User model
  User.init(
    {
      ID: {
        type: DataTypes.INTEGER,
        autoIncrement: true,
        primaryKey: true,
      },
      USER_NAME: {
        type: new DataTypes.STRING(50),
        allowNull: false,
        unique: true,
      },
      EMAIL: {
        type: new DataTypes.STRING(50),
        allowNull: false,
        unique: true,
      },
      CREATED_AT: {
        type: DataTypes.DATE,
        defaultValue: DataTypes.NOW,
      },
    },
    {
      sequelize,
      tableName: "USERS",
      timestamps: false,
    }
  );

  return User;
};

export { User };
export default UserFactory;
- Build the app by running the following command:
npm run build
- Start the app by running the following command:
npm run start
-
On the terminal output, take note of the value of Benchmark: xx.xxxms for this app, as it will be used later to compare with the result of the MySQL Node.js app run.
-
Scroll up and look at the terminal output, what SQL commands were produced by the app? Take a note of these, as you will need to write it in the Comments text area when submitting this lab.
Implement Lab-2-3 Library app (Sequelize-Node-App)
- Modify the .env file of the Sequelize-Node-App and update the value of SQL_DB_NAME to the name of the library app schema.
SQL_DB_NAME=NAME_OF_LIBRARY_APP_SCHEMA
-
Modify the index.ts file of the Sequelize-Node-App and write code that populates one of the tables of your library app. Using the sample code, create the corresponding model to support this.
-
Build and run the modified app and take a screenshot of the terminal output and save it as library-sequelize-node-app.png.
Submission
- Create a folder named submit.
Delete the node_modules folder on any app that you are submitting.
-
Copy the MySql-Node-App and Sequelize-Node-App folder and all the screenshots (library-mysql-node-app.png and library-sequelize-node-app.png) to the submit folder.
-
Compare the benchmark values of the screenshots: library-mysql-node-app.png and library-sequelize-node-app.png. and write your conclusion in the Comments text area.
-
Write the answers to Step 23 of the Create a Basic Sequelize Node.js App section of the lab in the Comments text area.
-
Create a zip file of the submit folder.
-
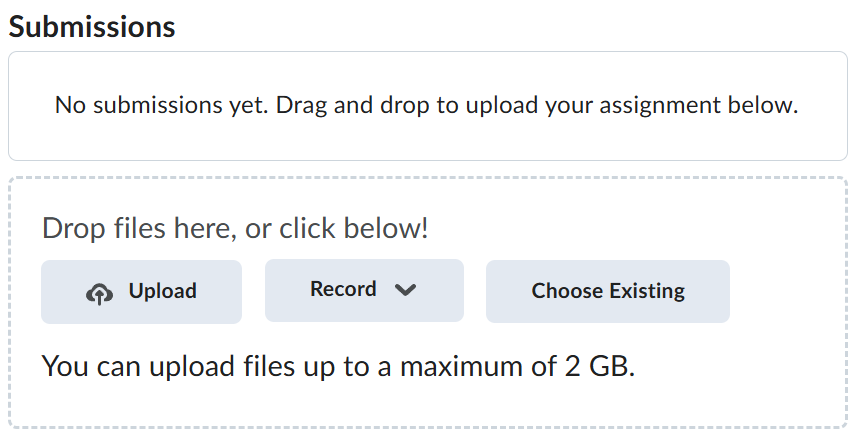
Navigate back to where the lab was originally downloaded, there should be a Submissions section (see below) where the zip file can be uploaded.