Lab-2-2
(2% of the course mark)
SQL Basics via MySQL Lab
- SQL Basics via MySQL is a hands-on laboratory course designed to introduce students to one of the world's most widely used relational database management systems. Through guided exercises and practical challenges, students will develop the foundational skills needed to interact with MySQL databases confidently and effectively. This lab bridges the gap between database theory and real-world application, giving students direct experience writing queries, managing data, and working within the MySQL environment.
Lab objectives
-
Create and drop database objects such as DATABASES and TABLES.
-
View existing databases objects using SHOW DATABASES and SHOW TABLES.
-
Use SQL commands such as SELECT, INSERT, UPDATE, and DELETE.
-
Combine matching rows from two tables using INNER JOIN.
-
Write clean, readable SQL statements following standard formatting and naming conventions.
- Ensure that Docker Desktop is installed and that a MySQL image and container are configured and running properly. These activities are covered in Lab 2-1.
Start MySQL container
-
Open Docker Desktop and click on Containers.
-
Locate mysql-container and start it by clicking the triangle icon under the Actions column.
- Ensure the mysql-container is running successfully before proceeding to the next step.
MySQL Workbench Connection
-
Open MySQL Workbench and click the (+) icon next to MySQL Connections to create a new connection.
-
Set the Connection Name to mysql-container.
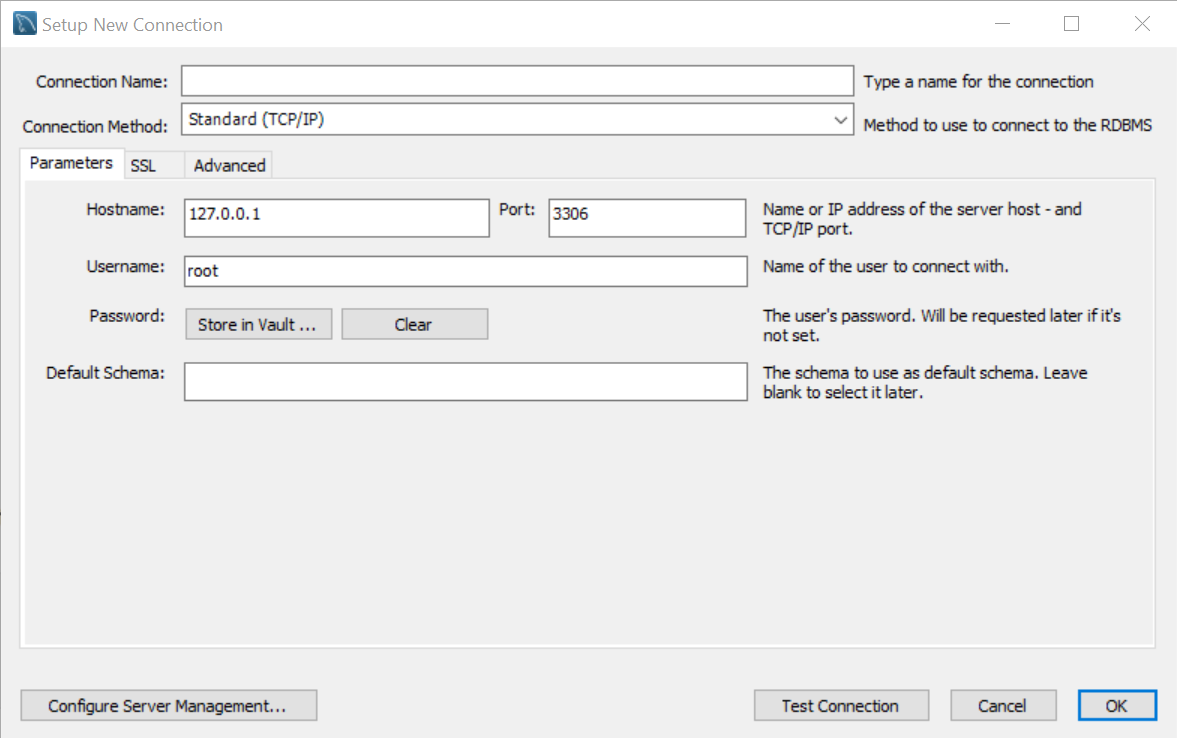
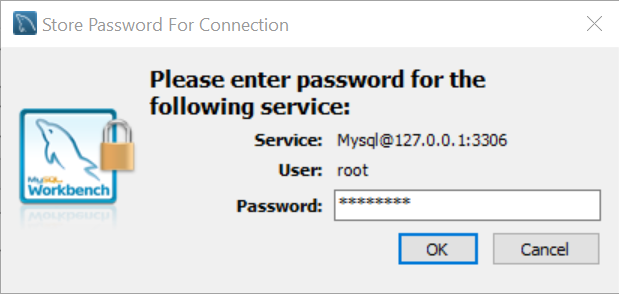
- Click Store in Vault... and enter password as the password.
- Click OK to save the connection.
Connect and Use DB
-
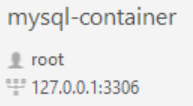
Open MySQL Workbench and click mysql-container connection to connect to the Docker MySQL db server.
-
Create the database: company_db, On the Query tab enter the following sql statements and click the execute icon ⚡.
CREATE DATABASE company_db;
- Use the database: company_db, On the Query tab enter the following sql statements and click the execute icon ⚡.
USE company_db;
Create Tables
- Create the departments table, on the Query tab enter the following sql statements and click the execute icon ⚡.
CREATE TABLE departments (
    department_id   INT            PRIMARY KEY AUTO_INCREMENT,
    department_name VARCHAR(100)   NOT NULL UNIQUE,
    location        VARCHAR(100)   DEFAULT 'Head Office',
    budget          DECIMAL(15, 2) CHECK (budget >= 0)
);
- Create the employees table, on the Query tab enter the following sql statements and click the execute icon ⚡.
CREATE TABLE employees (
    employee_id   INT            PRIMARY KEY AUTO_INCREMENT,
    first_name    VARCHAR(50)    NOT NULL,
    last_name     VARCHAR(50)    NOT NULL,
    email         VARCHAR(150)   NOT NULL UNIQUE,
    phone         VARCHAR(20),
    hire_date     DATE           NOT NULL,
    salary        DECIMAL(10, 2) CHECK (salary > 0),
    is_active     BOOLEAN        DEFAULT TRUE,
    department_id INT,

    -- Foreign key with ON DELETE SET NULL
    -- If a department is deleted, employee row stays but department_id becomes NULL
    FOREIGN KEY (department_id)
        REFERENCES departments(department_id)
        ON DELETE SET NULL
);
- Create the projects table, on the Query tab enter the following sql statements and click the execute icon ⚡.
CREATE TABLE projects (
    project_id    INT          PRIMARY KEY AUTO_INCREMENT,
    project_name  VARCHAR(150) NOT NULL,
    start_date    DATE,
    end_date      DATE,
    department_id INT,

    -- Foreign key with ON DELETE CASCADE
    -- If a department is deleted, its projects are also deleted
    FOREIGN KEY (department_id)
        REFERENCES departments(department_id)
        ON DELETE CASCADE
);
- Create the employee_projects junction table, on the Query tab enter the following sql statements and click the execute icon ⚡.
CREATE TABLE employee_projects (
    employee_id INT          NOT NULL,
    project_id  INT          NOT NULL,
    role        VARCHAR(100),

    PRIMARY KEY (employee_id, project_id), -- Composite primary key

    FOREIGN KEY (employee_id)
        REFERENCES employees(employee_id)
        ON DELETE CASCADE,

    FOREIGN KEY (project_id)
        REFERENCES projects(project_id)
        ON DELETE CASCADE
);
Insert Data
- Populate the departments table, on the Query tab enter the following sql statements and click the execute icon ⚡.
INSERT INTO departments (department_name, location, budget) VALUES
('Engineering', 'Floor 3',     500000.00),
('Marketing',   'Floor 2',     200000.00),
('HR',          'Floor 1',     150000.00),
('Finance',     'Head Office', 300000.00);
- Populate the employees table, on the Query tab enter the following sql statements and click the execute icon ⚡.
INSERT INTO employees (first_name, last_name, email, phone, hire_date, salary, department_id) VALUES
('Alice', 'Smith',  'alice@company.com', '555-1001', '2020-03-15',  95000.00, 1),
('Bob',   'Jones',  'bob@company.com',   '555-1002', '2019-07-01',  88000.00, 1),
('Carol', 'White',  'carol@company.com', '555-1003', '2021-01-10',  72000.00, 2),
('David', 'Brown',  'david@company.com', '555-1004', '2018-11-20',  65000.00, 3),
('Eva',   'Davis',  'eva@company.com',   '555-1005', '2022-06-05', 110000.00, 1),
('Frank', 'Miller', 'frank@company.com', '555-1006', '2020-09-30',  78000.00, 4),
('Grace', 'Wilson', 'grace@company.com', '555-1007', '2023-02-14',  60000.00, 2);
- Populate the projects table, on the Query tab enter the following sql statements and click the execute icon ⚡.
INSERT INTO projects (project_name, start_date, end_date, department_id) VALUES
('Website Redesign',  '2024-01-01', '2024-06-30', 1),
('Brand Campaign',    '2024-03-01', '2024-09-30', 2),
('HR System Upgrade', '2024-02-01', '2024-12-31', 3),
('API Modernisation', '2024-04-01', '2025-03-31', 1);
- Populate the employee_projects table, on the Query tab enter the following sql statements and click the execute icon ⚡.
INSERT INTO employee_projects (employee_id, project_id, role) VALUES
(1, 1, 'Tech Lead'),
(2, 1, 'Backend Developer'),
(5, 1, 'Frontend Developer'),
(3, 2, 'Campaign Manager'),
(7, 2, 'Content Writer'),
(4, 3, 'Project Coordinator'),
(1, 4, 'Architect'),
(2, 4, 'Developer');
Select Data
- Get all the employees, on the Query tab enter the following sql statements and click the execute icon ⚡.
SELECT * FROM employees;
-
Take a screenshot of the results and save it as all-employees.png.
-
Get all the employees with specific columns, on the Query tab enter the following sql statements and click the execute icon ⚡.
SELECT first_name, last_name, salary FROM employees;
-
Take a screenshot of the results and save it as specific-columns-all-employees.png.
-
Get all the employees earning over 80k, on the Query tab enter the following sql statements and click the execute icon ⚡.
SELECT first_name, last_name, salary
FROM employees
WHERE salary > 80000;
-
Take a screenshot of the results and save it as employees-where.png.
-
Get all the employees earning over 70k and department_id = 1, on the Query tab enter the following sql statements and click the execute icon ⚡.
SELECT first_name, last_name, salary, department_id
FROM employees
WHERE salary > 70000 AND department_id= 1;
-
Take a screenshot of the results and save it as employees-and.png.
-
Get all the employees in department_id 1 or 2, on the Query tab enter the following sql statements and click the execute icon ⚡.
SELECT first_name, last_name, department_id
FROM employees
WHERE department_id IN (1, 2);
-
Take a screenshot of the results and save it as employees-in.png.
-
Get all the employees with first names start with A or D, on the Query tab enter the following sql statements and click the execute icon ⚡.
SELECT first_name, last_name
FROM employees
WHERE first_name LIKE 'A%' OR first_name LIKE 'D%';
-
Take a screenshot of the results and save it as employees-like.png.
-
Get all the employees and order by salary in descending order, on the Query tab enter the following sql statements and click the execute icon ⚡.
SELECT first_name, last_name, salary
FROM employees
ORDER BY salary DESC;
-
Take a screenshot of the results and save it as employees-order-by-01.png.
-
Get all the employees salary and order by ascending(department_id) and descending(salary), on the Query tab enter the following sql statements and click the execute icon ⚡.
SELECT first_name, last_name, department_id, salary
FROM employees
ORDER BY department_id ASC, salary DESC;
- Take a screenshot of the results and save it as employees-order-by-02.png.
Joins
- Get all employees with their department name, on the Query tab enter the following sql statements and click the execute icon ⚡.
SELECT
    e.employee_id,
    e.first_name,
    e.last_name,
    e.salary,
    d.department_name,
    d.location
FROM employees e
INNER JOIN departments d ON e.department_id = d.department_id;
-
Take a screenshot of the results and save it as inner-join.png.
-
Get all employees with or without their department name, on the Query tab enter the following sql statements and click the execute icon ⚡.
SELECT
    e.first_name,
    e.last_name,
    d.department_name
FROM employees e
LEFT JOIN departments d ON e.department_id = d.department_id;
- Take a screenshot of the results and save it as left-join.png.
Update Data
- Give all Engineering employees a 10% raise, on the Query tab enter the following sql statements and click the execute icon ⚡.
UPDATE employees
SET salary = salary * 1.10
WHERE department_id = (
    SELECT department_id FROM departments WHERE department_name = 'Engineering'
);
-- Verify the changes
SELECT * FROM employees WHERE department_id = (
    SELECT department_id FROM departments WHERE department_name = 'Engineering'
);
-
Take a screenshot of the results and save it as update-01.png.
-
Update a single employee's phone number, on the Query tab enter the following sql statements and click the execute icon ⚡.
UPDATE employees
SET phone = '555-9999'
WHERE email = 'alice@company.com';
-- Verify the changes
SELECT * FROM employees WHERE email = 'alice@company.com';
-
Take a screenshot of the results and save it as update-02.png.
-
Deactivate employees hired before 2020, on the Query tab enter the following sql statements and click the execute icon ⚡.
UPDATE employees
SET is_active = FALSE
WHERE hire_date < '2020-01-01';
-- Verify the changes
SELECT first_name, last_name, salary, is_active FROM employees ORDER BY hire_date;
- Take a screenshot of the results and save it as update-03.png.
Delete Data
- Delete a specific employee (cascades to employee_projects), on the Query tab enter the following sql statements and click the execute icon ⚡.
DELETE FROM employees
WHERE email = 'grace@company.com';
-- Verify deletion
SELECT first_name, last_name FROM employees;
-
Take a screenshot of the results and save it as delete-01.png.
-
Delete the Finance department, on the Query tab enter the following sql statements and click the execute icon ⚡.
DELETE FROM departments WHERE department_name = 'Finance';
-- Verify deletion
SELECT *FROM employees WHERE email = 'frank@company.com';
-
Take a screenshot of the results and save it as delete-02.png.
-
Delete the Marketing department, on the Query tab enter the following sql statements and click the execute icon ⚡.
DELETE FROM departments WHERE department_name = 'Marketing';
-- Verify deletion
-- Marketing department projects ('Brand Campaign') should also be deleted automatically
SELECT * FROM projects;
--
- Take a screenshot of the results and save it as delete-03.png.
Cleanup
- On the Query tab enter the following sql statements and click the execute icon ⚡.
-- Must drop child tables before parent tables
DROP TABLE IF EXISTS employee_projects;
-- Must drop child tables before parent tables
DROP TABLE IF EXISTS projects;
-- Must drop child tables before parent tables
DROP TABLE IF EXISTS employees;
-- Must drop child tables before parent tables
DROP TABLE IF EXISTS departments;
-- Drop database
DROP DATABASE IF EXISTS company_db;
Submission
-
Create a folder named submit.
-
Copy all the screenshots to the submit folder.
-
Create a zip file of the submit folder.
-
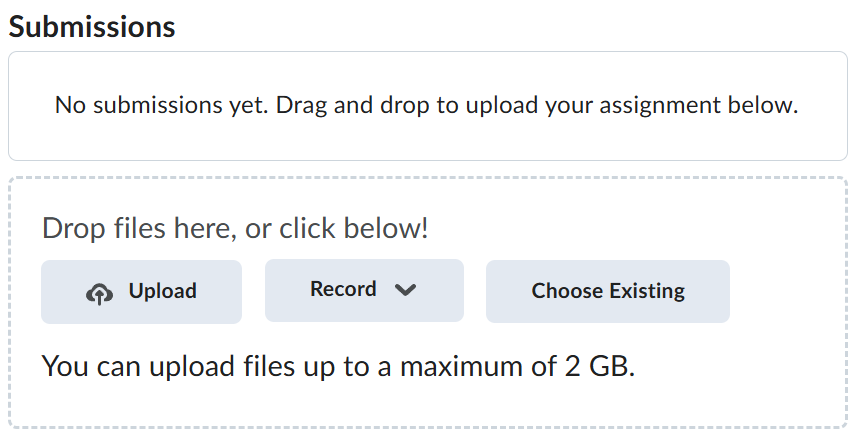
Navigate back to where the lab was originally downloaded, there should be a Submissions section (see below) where the zip file can be uploaded.