Lab Prerequisites
Required Software Packages
- Software packages that must be installed to complete the labs for this course.
Visual Studio Code
-
Navigate to https://code.visualstudio.com/Download and download the version of Visual Studio Code based on your Operating System.
-
Install Visual Studio Code and follow the on-screen prompts.
-
Take a screenshot of the successful installation of Visual Studio Code and save it as vscode.png.
Visual Studio Code Configuration
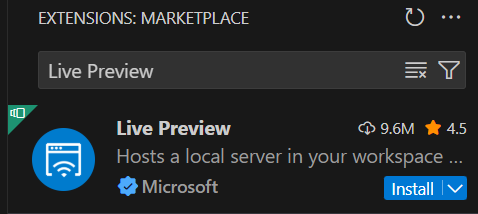
- Open Visual Studio Code, on the left sidebar click on the Extensions icon.

- In the EXTENSIONS: MARKETPLACE text box enter Live Preview and click on Install.
-
Take a screenshot of the successful installation of Live Server and save it as vscode-extension-live-preview.png.
-
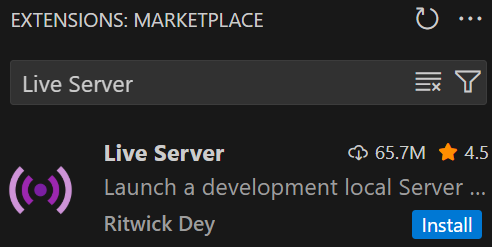
In the EXTENSIONS: MARKETPLACE text box enter Live Server and click on Install.
-
Take a screenshot of the successful installation of Live Server and save it as vscode-extension-live-server.png.
-
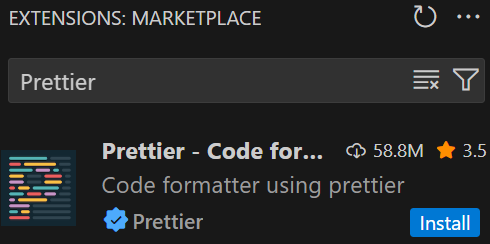
In the EXTENSIONS: MARKETPLACE text box enter Prettier and click on Install.
-
Take a screenshot of the successful installation of Prettier and save it as vscode-extension-prettier.png.
-
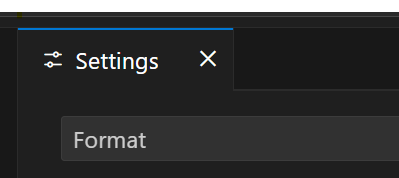
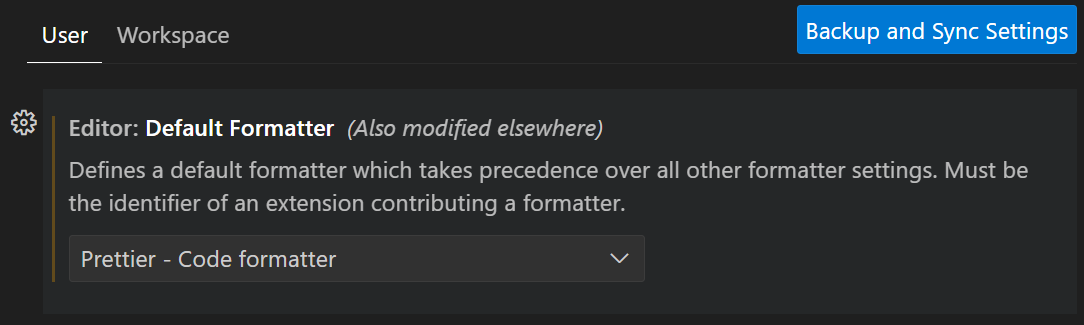
Click on File > Preferences > Settings and type Format.
- Look for the Default Formatter setting and choose Prettier - Code formatter.
-
Take a screenshot and save it as vscode-extension-prettier-default-formatter.png.
-
Look for the Format On Save setting and make sure it is enabled.

- Take a screenshot and save it as vscode-extension-prettier-format-on-save.png.
Node.js
-
Navigate to https://nodejs.org/en/download/prebuilt-installer and download the version of Node.js based on your Operating System.
-
Install Node.js and follow the on-screen prompts.
When installing Node.js, carefully read the on-screen prompts and be sure to enable the option to Automatically install the necessary tools....
If you are using Windows, do the following steps:
-
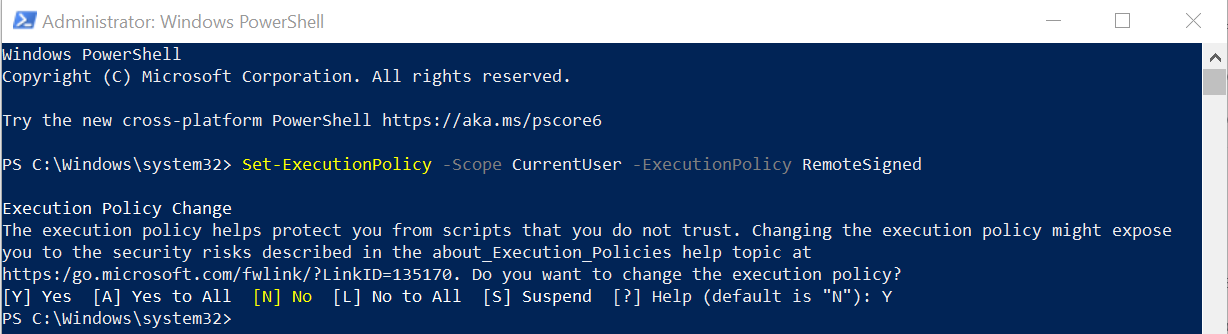
On Windows search for PowerShell.
-
Right-click it and Run as Administrator.
-
Type this command:
Set-ExecutionPolicy -Scope CurrentUser -ExecutionPolicy RemoteSigned
-
Press enter.
-
When prompted confirm Y.
- Take a screenshot of the successful installation of Node.js and save it as nodejs.png.
Postman
-
Navigate to https://www.postman.com and download the version of Postman based on your Operating System.
-
Install Postman and follow the on-screen prompts.
-
Take a screenshot of the successful installation of Postman and save it as postman.png.
Docker
-
Navigate to https://www.docker.com/products/docker-desktop and download the version of Docker based on your Operating System.
-
Install Docker and follow the on-screen prompts.
-
Take a screenshot of the successful installation of Postman and save it as docker.png.
MySQL Workbench
-
Navigate to https://www.mysql.com/products/workbench and download the version of MySQL Workbench based on your Operating System.
-
Install MySQL Workbench and follow the on-screen prompts.
-
Take a screenshot of the successful installation of Postman and save it as mysql-workbench.png.
MongoDBCompass
-
Navigate to https://www.mongodb.com/products/tools/compass and download the version of MongoDBCompass based on your Operating System.
-
Install MongoDBCompass and follow the on-screen prompts.
-
Take a screenshot of the successful installation of MongoDBCompass and save it as mongodb-compass.png.
GitHub
-
Navigate to https://github.com and sign up for a GitHub account.
-
Currently you will have an option to use: Google account, Apple account, and Any email account.
-
Pay attention to the prompts, it may include but not limited to: Password complexity, Username, and Country / Region.
-
You also have to verify the account to complete the process.
-
Take a screenshot of the successful creation of the GitHub account and save it as github.png.
- When signing up for this service always choose the personal / non-commercial / free account.
Cloudflare
-
Navigate to https://www.cloudflare.com and sign up for a Cloudflare account.
-
Currently you will have an option to use: Google account, Apple account, GitHub account, and Any email account.
-
Pay attention to the prompts, it may include but not limited to: Password complexity and CAPTCHA verification.
-
Take a screenshot of the successful creation of the Cloudflare account and save it as cloudflare.png.
- When signing up for this service always choose the personal / non-commercial / free account.
Render
-
Navigate to https://render.com and sign up for a Render account.
-
Currently you will have an option to use: GitHub account, GitLab account, Bitbucket account, Google account, and Any email account.
-
Pay attention to the prompts, it may include but not limited to: Password complexity.
-
Take a screenshot of the successful creation of the Render account and save it as render.png.
- When signing up for this service always choose the personal / non-commercial / free account.
MongoDB Account
-
Navigate to https://www.mongodb.com and sign up for a MongoDB account.
-
Currently you will have an option to use: Google account or Any email account.
-
Pay attention to the prompts, it may include but not limited to: Password complexity.
-
Take a screenshot of the successful creation of the MongoDB account and save it as mongodb.png.
- When signing up for this service always choose the personal / non-commercial / free account.
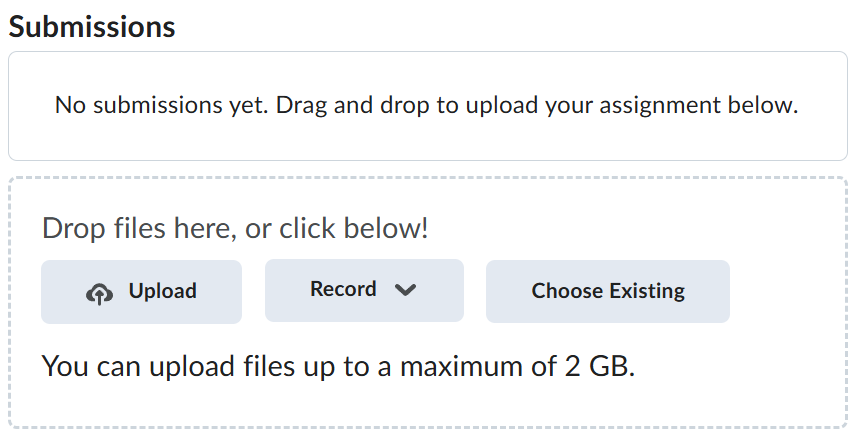
Submission
-
Create a folder named submit.
-
Copy all (vscode.png, vscode-extension-live-preview.png, vscode-extension-live-server.png, vscode-extension-prettier.png, vscode-extension-prettier-default-formatter.png, vscode-extension-prettier-format-on-save.png, nodejs.png, postman.png, github.png, cloudflare.png, docker.png, mysql-workbench.png, mongodb-compass.png, github.png, cloudflare.png, render.png, and mongodb.png) the previously saved screenshots to this folder.
-
Create a zip file of this folder.
-
Navigate back to where the lab was originally downloaded, there should be a Submissions section (see below) where the zip file can be uploaded.